Concrete is a versatile, durable, and cost-effective material that can be used for various applications in downtown San Jose, including driveways, patios, sidewalks, and more. Whether you are a homeowner looking to enhance your property or a business owner aiming to improve your premises, understanding the concrete installation downtown san jose process is crucial. This guide will take you through the planning, preparation, and installation steps to ensure a successful concrete project.
Benefits of Concrete Installation
- Durability: Concrete is known for its strength and longevity, making it ideal for high-traffic areas.
- Versatility: It can be molded into any shape and finished in a variety of textures and colors.
- Low Maintenance: Once installed, concrete requires minimal maintenance compared to other materials.
- Cost-Effective: The initial investment is reasonable, and the long-term maintenance costs are low.
Planning Your Concrete Installation
- Determine the Purpose: Identify the primary use of the concrete surface—whether it’s for a driveway, patio, walkway, or another purpose. This will influence the design and thickness requirements.
- Local Regulations: Check the local building codes in San Jose and obtain any necessary permits before beginning your project.
- Design Considerations: Plan the dimensions, shape, and layout of your concrete installation. Consider any drainage requirements and ensure the design complements your property.
Preparing for Concrete Installation
- Site Preparation:
- Clear the Area: Remove any existing structures, vegetation, and debris from the installation site.
- Excavation: Excavate the site to the required depth, typically 6-12 inches, depending on the project. Ensure the subgrade is well-compacted and level.
- Base Layer: Spread a 4-6 inch layer of gravel or crushed stone and compact it thoroughly. This provides a stable foundation and helps with drainage.
- Forming:
- Construct Forms: Use wooden or metal forms to outline the area to be concreted. Ensure they are straight, level, and securely anchored.
- Reinforcement: Place steel rebar or wire mesh within the forms to reinforce the concrete and prevent cracking.
Installing the Concrete
- Mixing the Concrete:
- Ready-Mix Concrete: For most projects, ready-mix concrete is a convenient option. It is mixed at a plant and delivered to your site.
- On-Site Mixing: For smaller projects or specific needs, you can mix concrete on-site using a portable mixer. Follow the manufacturer’s instructions for the correct mix ratio.
- Pouring the Concrete:
- Pouring: Begin pouring the concrete into the forms, starting from the far end and working towards the entrance. Use shovels or rakes to distribute the concrete evenly.
- Leveling: Use a screed board to level the concrete surface, moving it back and forth across the forms. Ensure the concrete is evenly distributed and level.
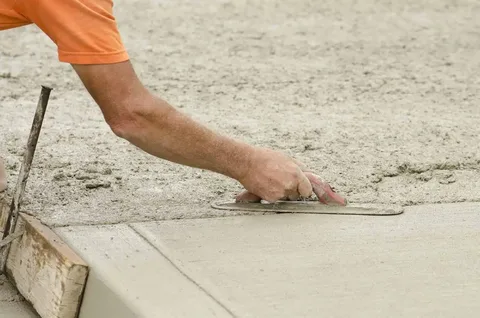
- Finishing:
- Floating: Use a bull float to smooth the surface and bring the cream (cement and water mix) to the top. This step should be done immediately after screeding.
- Edging: Use an edging tool to create clean edges along the forms. This helps prevent chipping and improves the overall appearance.
- Texturing: Apply a broom finish, trowel finish, or stamp the concrete if desired. Texturing provides slip resistance and enhances the visual appeal.
- Curing:
- Curing Process: Cover the concrete with plastic sheeting or use a curing compound to retain moisture. Proper curing is essential for the concrete to achieve its full strength and durability.
- Duration: Allow the concrete to cure for at least 7 days, with optimal curing taking up to 28 days. Protect the surface from foot and vehicle traffic during this period.
Post-Installation Care
- Sealing: Once the concrete is fully cured, apply a sealer to protect it from stains, chemicals, and weather damage. Reapply the sealer every 2-3 years for ongoing protection.
- Maintenance: Regularly clean the concrete surface to remove dirt and debris. Address any cracks or damage promptly to prevent further deterioration.
- Weather Considerations: In San Jose, concrete is less susceptible to freeze-thaw cycles, but it’s still important to avoid excessive water pooling on the surface.
Conclusion
Concrete installation in downtown San Jose offers a durable, versatile, and aesthetically pleasing solution for various outdoor projects. By following these steps and ensuring careful planning and execution, you can achieve a high-quality concrete surface that will last for years to come
Leave a Reply